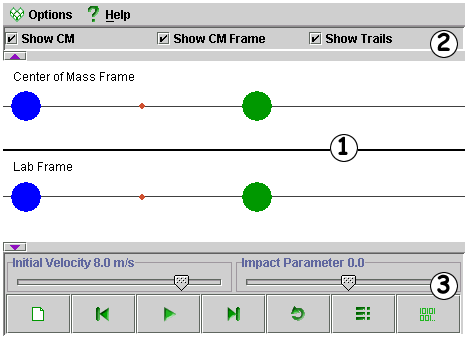
Click on a number to view the explanation of the corresponding item
|
Show CM - this option allows you to view
or hide the centre of mass (CM). When visible, the CM is shown as
a red dot, located on the axis between the masses. By default, this
option is checked on. |
|
| |
Show CM Frame - this option allows you to view or hide the centre of mass frame (CM frame). When checked on, both the CM frame and the lab frame are shown. When unchecked, only the lab frame is visible. By default this option is checked on. The CM frame shows the collision from the frame of
reference of the centre of mass. |
| |
Show Trails - this option allows you to view or hide the path travelled by each mass and the CM before, during and after the collision. |
|
New - sets up a new collision scenario. |
|
|
Back - allows you to go backward, step by step. |
|
|
Play - press to begin simulation. When you press play, this button turns into the pause button. |
|
|
Pause - press to pause simulation. When you press play, this button turns back into the play button. |
|
|
Forward - allows you to go forward, step by step. |
|
|
Reset - will reset that particular scenario to start again from the beginning. |
|
|
Options - allows you to set collision conditions. You may select either random or manually input values for the coefficient of restitution and the masses of the balls. |
|
|
Data - pressing this will open a box with information about the collisions, the masses and the centre of mass. |
|
|
Initial Velocity - this slider adjusts the initial velocity of the blue ball in the lab frame. The velocity may range between 0.1 m/s and 10 m/s. |
|
Impact Parameter - this slider adjusts the horizontal alignment of the two balls and ranges between 1.0 and -1.0. A value of 0.0 aligns the balls horizontally and results in a head-on collision. A negative value lowers the blue ball whereas a positive value raises the blue ball. A non-zero value for the impact parameter results in a glancing, 2D collision. |
|
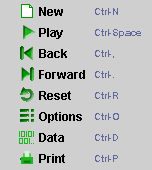
The applet can also be controlled by a drop down menu or with keyboard shortcuts. Right click in display panel - the menu will appear, just like the one to the right. The buttons are all listed, along with their shortcuts. Clicking the down arrow |
 |