Show Me - Free Body Drawer

The applet Free Body Drawer teachers you how to create Free Body Diagrams


Preamble

This applet can be used to develop the skills needed to construct Free Body Diagrams (FBD's)

This page is designed to get you started using the applet. The applet should be open. The step-by-step instructions on this page are to be done in the applet. You may need to toggle back and forth between instructions and applet if your screen space is limited.


Contents


How to Open A Project and Select an Image

  1. Free Body Drawer uses projects which consist of sets of images. The projects are listed in a menu that can be opened by pressing () which appears in the upper, left of the applet. The figure on the right shows a typical project menu. Just select the appropriate choice. The menu will close and the first image of the project that you selected will appear.
  1. When you first open Free Body Drawer the first image from the first project is loaded. To see the total set of images that are available to you, press the FBD's button () which appears on the control panel. This will open up a table of images similar to the ones shown below. Each of the small thumbnail images is a button - just click on the image you wish to work with.
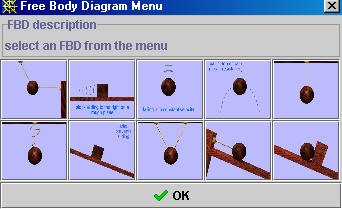
 

  1. Close the Free Body Diagram Menu by pressing
  2. Practice choosing different projects and files.

How to Make a Free Body Diagram

  1. As an example,load project "Sample Project"( ) and choose from the Free Body Diagram Menu. This will load the image shown on the right.
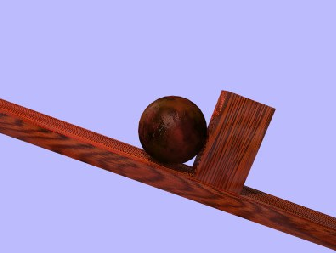
  2. You can use the mouse to draw anywhere on this image. The applet is, by default, in the draw new vectors mode (). To create a vector simply position the mouse where you wish to begin the vector ("tail of the vector") and then press the left-mouse-button and drag in the direction and to the length you wish.


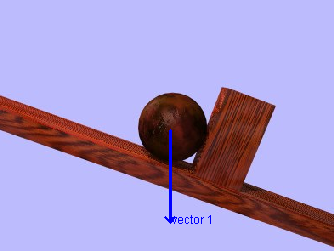
  1. As an example, try drawing in a vector that will be used to represent the weight of the ball. Position the mouse near the center of the ball and drag straight down. You should see something similar to the figure on the right.
  2. If you are "happy" with this vector you can continue and draw more vectors if appropriate. How to edit the vector you just made is discussed in the next section.
  3. Let's assume that you are happy with the vector just made but would like to give it a better label than "vector 1". To do this first note that in the "selected vectors" panel on the right vector 1 is highlighted (its also the only vector there so far). This means that vector 1 is "selected" and you can modify its name simply by typing the name you want to use in the space under "Selected Vector Name" . Type in Weight or any other name you think is appropriate.
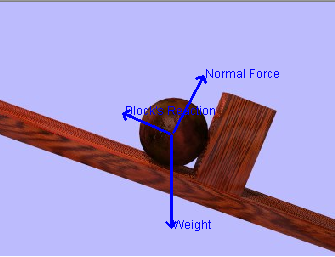
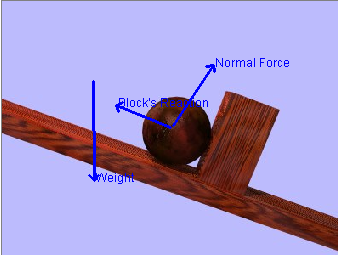
  1. The figure on the right shows the Free Body Diagram with the remaining two forces drawn in. Try to duplicate this. If you forget to type in the name of one of the vectors, take a look at the next section to see how to edit vectors.


How to Edit my Free Body Diagram

  1. Once you have constructed a free body diagram you may wish to alter it. You can:
    • reposition the vectors to make them easier to see (some people even argue that the correct way to draw a FBD is to draw the forces from a point that is NOT drawn on the body itself)
    • change the length or direction of a vector
    • change the colour of the vector to make it more legible
    • rename a vector
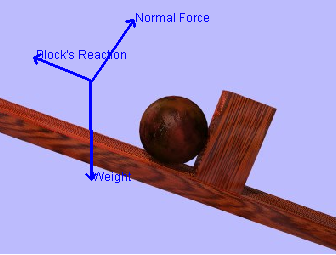
  2. As an example let's modify the FBD that you made in the previous section. In particular we will want to move the vectors to make them more legible, and change their colours.
  1. Let's start by selecting the vectors. To do this, click on the current name of the vector. This makes that vector "active" and allows you to then edit it. For example, let's reposition the weight vector. So, first select weight (see figure on the right).
  1. Next, press the "set vector origin(s)" button (). You may now drag the Weight vector to any location you wish. Move it to the position shown in the image on the right.
  2. Now move the remaining two vectors. Again, to move either the Normal Force vector or the Block Reaction vector, you must first select that vector. This is an easy step to forget!
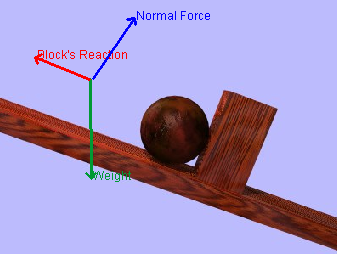
  3. At this stage you may wish to change the colour of each vector. For example, let's make:
    • the weight vector Green
    • the Normal force vector Blue
    • the Block's reaction force Red


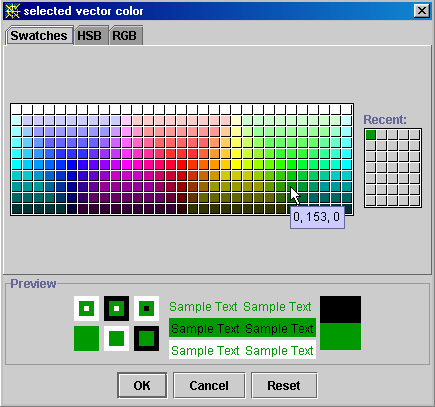
  1. To do this you will need to once again select the vector that you want to change and then press the color icon (). This opens the colour editing panel shown on the right. Simply click on the colour that you want and then press "OK" to close the colour dialogue. The vector and its label will now appear in the newly selected colour.


  1. Do this for all of the vectors. When you are finished your FBD should look like the one shown below.


How to Check My Free Body Diagram

  1. Once you have finished the free body diagram, you will want to check it against the computer generated FBD. To do this press the "done" button () and then press the "show" button ()
  1. A pop-up window will appear with a drawing of the FBD that is (hopefully!) similar to the one you just made. An example of what you will see is shown on the right.