|
|
|
|
Click on a number to view the explanation of the corresponding item.
There are four basic control buttons. They are, from left to right:
 Rewind. Resets the simulation to the starting
point with the previously chosen values for the
system parameters. After clicking Replay, click Play
to restart the motion.
 /
/ Play/Pause. Clicking
  starts the
motion.
After Play has been clicked, the button will change
into the Pause button  . Click it if you want to take a
'snapshot' of the motion at a given instant. To
resume the motion, click Play once more.
 Step. Lets you step through the motion in equal
time steps. The step size can be adjusted with the Time
Step slider. See Point 6. In the Incremental mode (see
Point 7), one must Step through the motion. Continuous
Play is disabled.
 Reset. Resets the applet to its default
setting.
Adjustments in the system parameters can only be made after first clicking REPLAY or RESET.

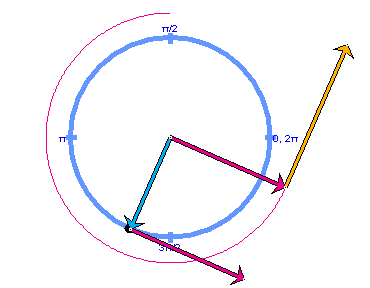
This toggle button lets you display/hide the circular blue path of the mass point. Angular positions in rad are indicated at the quarter points of the circle.
After clicking Rewind or Reset, the mass point can be dragged to any starting position along the circle.

This toggle button lets you display/hide the path of the tip of the velocity vector whose tail end is fixed at the origin. The path is shown in magenta. When the length of the arrow representing the velocity is scaled with the Zoom Slider (see Point 6 below) the velocity trace is scaled acccordingly.
If you click Rewind, set the initial velocity to a different value, and Play the motion while the Velocity Trace button is selected, the velocity traces of all previous motions will remain displayed in grey while the new velocity trace is being drawn in magenta.

The applet can be run in two modes: the "Continuous" mode or the "Incremental" mode. For details, see Point 7 below. The content of the Data box depends on the mode. In either mode, you can display/hide the Data box with the Data toggle button and you can click on the Data box and drag it to a convenient location or even off the screen.
Continuous Mode.

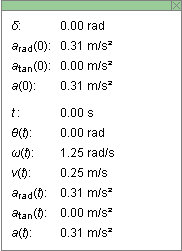
In the Continuous mode, the Data box lists the following data, as illustrated in the preceding image.
Top half. Constants of the motion and initial values.
Note. The phase angle d can be chosen before starting the motion by dragging the mass point in its circular orbit.
Bottom half. Values of time-dependent quantities at time t.
Incremental Mode.

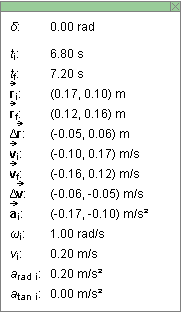
In the Incremental mode, the Data box lists the following data, as illustrated in the preceding image. The subscripts "i" and "f" refer to the initial and final instant, respectively, of a given time step. Vectors are given in terms of their x and y components, where the x-axis points to the right and the y-axis upward.
 i: position vector at beginning of
time step
 f: position vector at end of time
step
 : change in position vector
during given time step
 i: velocity vector at beginning of
time step
 f: velocity vector at end of time
step
 : change in velocity vector
during given time step
 i: acceleration vector at beginning
of time step


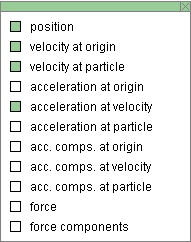
The Vectors toggle button lets you display/hide the Vector Panel illustrated in the preceding image. Selecting a vector in this panel will cause that vector to be displayed. In the Continuous mode, all vectors listed in the panel can be displayed. In the Incremental mode, the acceleration component vectors and the force vectors are unavailable.
The items available in the panel (only some of which are selected in the preceding image) have the following interpretation:
There are eight sliders in all, arranged in two rows of four each. Clicking on a slider to the left or right of the slider tab allows fine adjustment of the slider setting.
Clicking on the Input Dialog button  of a slider will open a dialog for entering an exact
value for the slider setting. The dialog for the
r-slider is illustrated below. The range in which
values can be entered, from 0.10 m to 0.30 m in this case,
is indicated above the data entry field.

First Row


Second Row


The applet can be run in one of two modes, the "Continuous" and "Incremental" modes. The mode is selected by clicking the appropriate radio button.
A typical applet display in the Continuous mode is pictured in the following image. The image shows

A typical applet display in the Incremental mode is pictured in the following image. The image shows

The content of the Data box is different in the two modes, as described in Point 4, "Data".